[ad_1]
Ever since Apple released the iOS 14 update in September, iPhone users have gone all out to make their home screens look great, and in this article, I’ll show you how you can customize your own. homepage ! Obviously, it’s up to you if you want your phone to be super aesthetic but devoid of features, or if you want to find the sweet spot where it can be both, so this guide will show you the basic steps. so you can add your own twist to your home screen! Remember that all of these steps are optional, so you can choose which ones you want to do!
Step 1: Find an aesthetic
Now this step is not necessary if you want your home screen to be very basic, but if you are particularly interested in a specific aesthetic or a few aesthetics, now is the time to consider how you want to integrate it into your home filter!
Personally, I like the beige/neutral aesthetic, as well as the dark college aesthetic, so my home screen includes both! Another idea, which I’ve seen quite a few people do, is to have separate pages (on your home screen) for different colors. This idea is for those who want their home screens to look good, but still want them to be highly functional. If you go for this idea, you won’t need to customize the app icons, which goes one step further and also makes your phone less functional.
Here is an example of a black splash screen:
This is probably the easiest way to personalize your home screen while giving it an aesthetic look. However, if you want to go further, here are some inspirations:
Remember, these are just a few of the literally endless possibilities out there! So to figure out which one you want for your home screen, I’d suggest creating a Pinterest board with a few images that appeal to you, then figuring out what the primary colors are for your aesthetic.
Step 2: Download the widget apps
There are many, many widget apps you can download, each with similar and different types of widgets.
The most popular at the moment is “Widgetsmith”, closely followed by “Color Widgets”. I also know of one called “Photo Widgets”. You can use any of them, or a combination of them, to get your special home screen look!
I would suggest Widgetsmith as it offers a number of widgets, while Color Widgets only has one widget style with date, day and time, and you can choose if you want it to show your percentage of battery. For some people, the Color Widgets widget is a bit overkill, but that depends on your preference. So I suggest you download it to check it out or look online to see what it looks like before downloading it.
Step 3: Shortcuts
If you’re wondering how all those home screens have completely different app icons, Shortcuts is the answer!
Although it’s not a new feature in iOS 14, it’s definitely more useful now because previously the shortcut and the actual app had to be on the home screen, but now you can just remove the actual app. Don’t worry, deleting the app won’t delete it, it will just move to the App Library, which you can access by swiping left from your home screen (or from the last page of your home screen).
Anyway, back to shortcuts –
1. Open the Shortcuts app and click the “plus” in the upper right corner.
2. Click on “Add an action”
3. Click “Scripting”, which is the third option on the top line that appears. It’s a gray circle with an x as an icon.
4. Click “Open Application” under Applications.
5. You can now choose the application that the shortcut will open by clicking “Choose”. This step will be different for each application you create a shortcut for.
6. Once you have selected an app, click on the three dots in the upper right corner.
7. Now click on “Add to Home Screen”.
8. You can now name your shortcut whatever you want, and can also change the icon by clicking the icon next to the shortcut name. This is where your aesthetic comes in. For example, if you have a neon aesthetic, you’ll save images of that aesthetic, either from Pinterest (which is probably the most appropriate, in my opinion) or other sites websites such as Unsplash. Now all you have to do is select one of these images to be your app icon!
9. Repeat the previous steps for each of the apps you want on your home screen. Yes, it’s a rather tedious process, so only do it for the apps you want on your home screen.
Step 4: create widgets
Now you have all your custom apps on your home screen, and you can remove the actual apps as well as other apps you don’t want on your home screen by long-pressing the screen and clicking the ‘minus’ in the top left corner of the app, then selecting “Move to app library”. Once your home screen is cleared of apps you don’t need or want, you can start creating widgets!
If you’re using Widgetsmith, you’ll need to click on the widget size you want – small, medium or large, then click on the widget that appears, which is probably a basic date/time widget with a black background. Now you can choose the type of widget you want from the many options in the “Style” menu. The next step differs depending on the style of widget you’ve chosen, but if it’s a date/time widget, you can change the font of what’s inside. Then you can choose the font color which is called “tint color” in the app, also background color and border color (if you want border).
This is where your aesthetic colors come into play – you can change the background color of the widget to any of these colors so that it matches your aesthetic. Here you can just play around with the different options and create your own widgets. To add photos as widgets, just choose the photo option under the widget style and then select a photo from your camera roll. Again, photos of your aesthetic will be used here.
Step 5: Add widgets to the home screen
Now you should have all your widgets ready in your widget app of choice, and your app shortcuts should be on your home screen. Now, how do you add your widgets to the home screen? Again, long press your screen and then click the plus button, which should be either at the top right or at the top left corner of your screen. Here you will get a list of widget options from the different apps you have, so you can choose some of them if you want.
To get your custom widgets from Widgetsmith or Color Widgets or any other widget app, scroll down to the different app choices and select the widget app you used. The apps are organized alphabetically, so Widgetsmith should be somewhere at the bottom.
Now you can choose the size of the widget – if you have created small size widgets, click on the small option and then click “Add widget”. To get the other two sizes, just swipe left and then add them to your home screen. If you’ve created a lot of widgets, you’ll need to repeat this process until they’re all on the screen. If the widget keeps repeating itself and you want the others you created, you need to long press on the widget and then select “Edit Widget”. Now click on the ‘Widget’ option and then choose one of the widgets you have created. You may also need to repeat this with the other widgets on your home screen.
Step 6: Assemble everything
Now that you have all your widgets and app shortcuts on your screen, all you have to do is move them around to get the structure you want. To move everything, you have to long press the screen again, and now you can move app shortcuts and widgets. Yay! You have finished!
Prime!
Alright, you’ve set up your home screen, but there are still some additional things you can try if you’re not already tired of customizing your screen!
Let’s say you have a bunch of widgets you want on your home screen, but there just isn’t enough space for them, or it’s too cluttered with so many widgets. In such a case, you can simply move the widget onto another, creating a “widget stack”. It’s perfect for people who want a bunch of widgets on their screens, or widgets that don’t match the aesthetic but are important, or if they’re just bored with current widgets (like me, haha)
Two other apps I use are ‘Motivation’ and ‘TuneTrack’. The former gives you a different quote every day and has a widget you can put on your home screen. You can also customize the theme to match your aesthetic. You’ll see how I used it below. The second app, TuneTrack, basically shows what you’re currently listening to. It works with Spotify and Apple Music, and when you add the widget to your home screen, you can see what song you’re playing right now. It’s definitely not a very functional widget, but for music lovers, it’s just amazing! You can see how I used this one too, below.
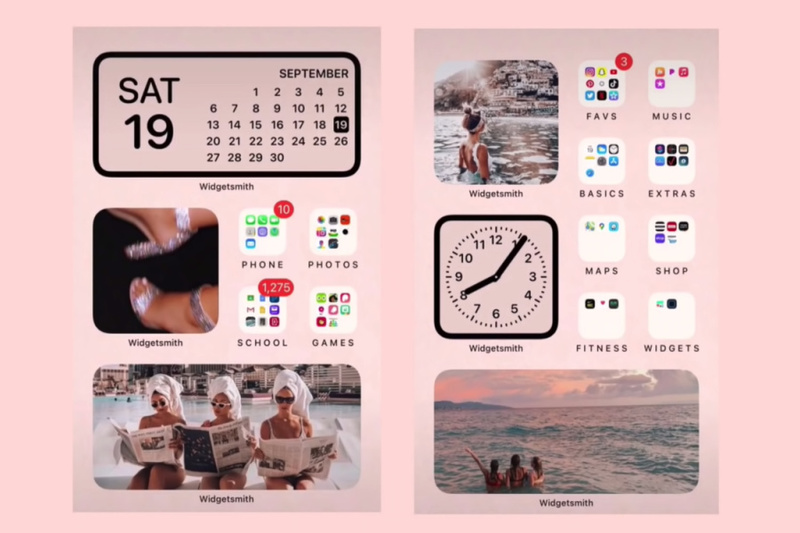
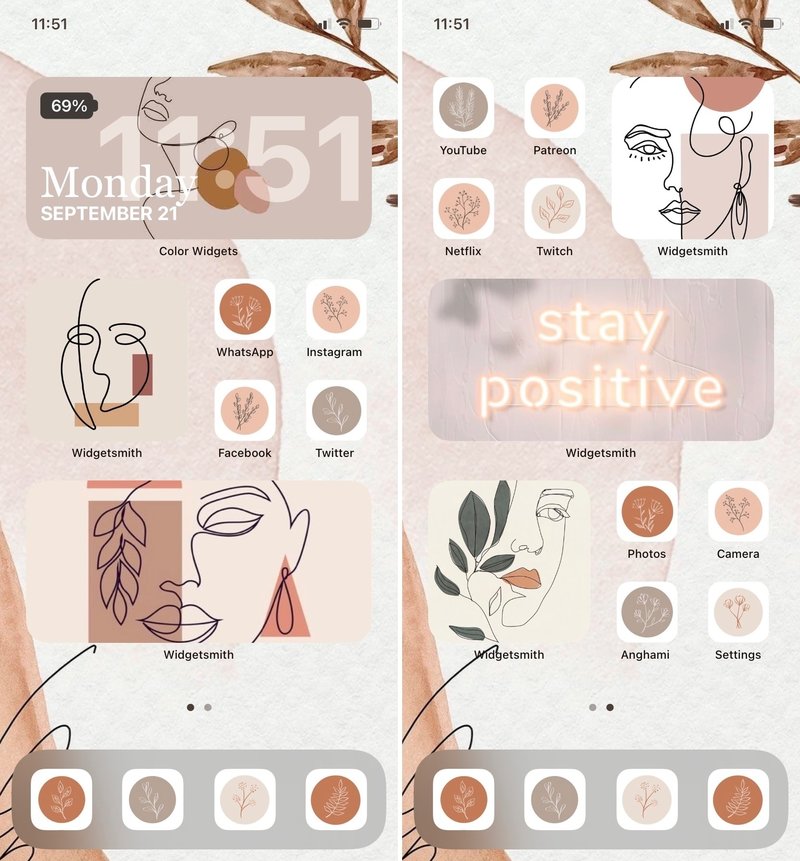
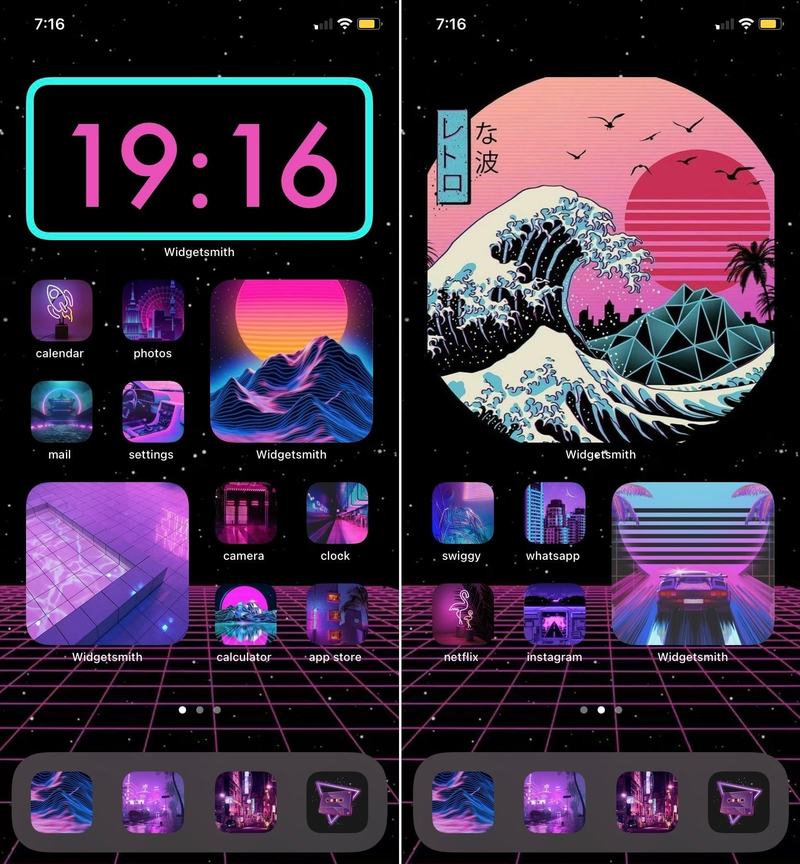
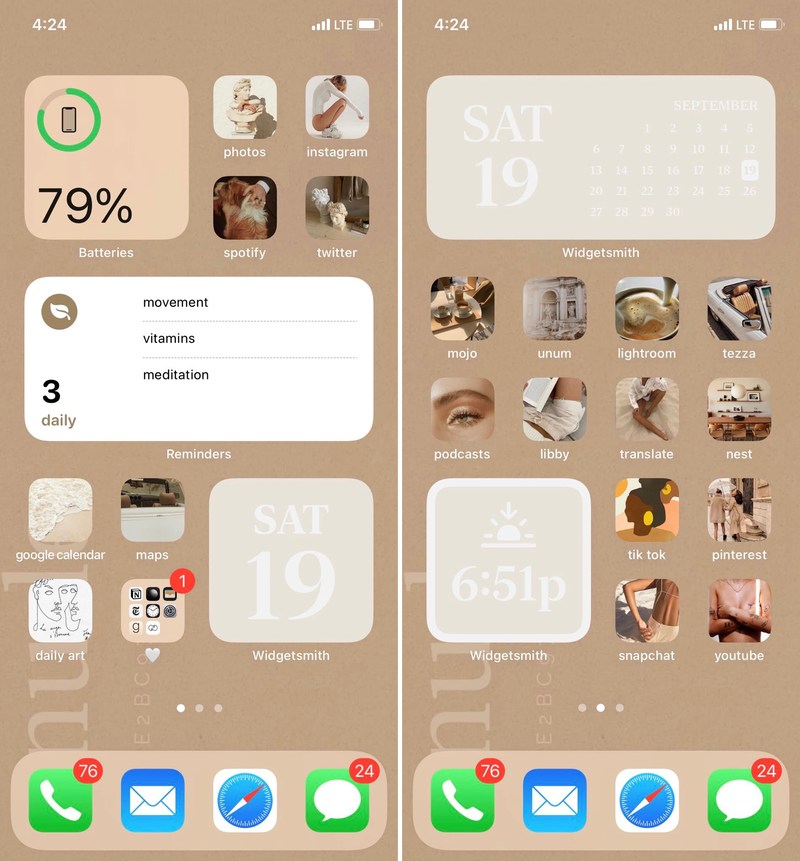
Here are some inspirations for you based on how I customized my home screen. It also includes some structure ideas. I didn’t use big widgets, but you sure can! Remember, this is just an idea, and there are plenty you can try!
PS I don’t use all of these pages, I did them at first but when I didn’t need them anymore, I just long pressed the screen, clicked on the dots that signify the different pages, then hid these I did not want.
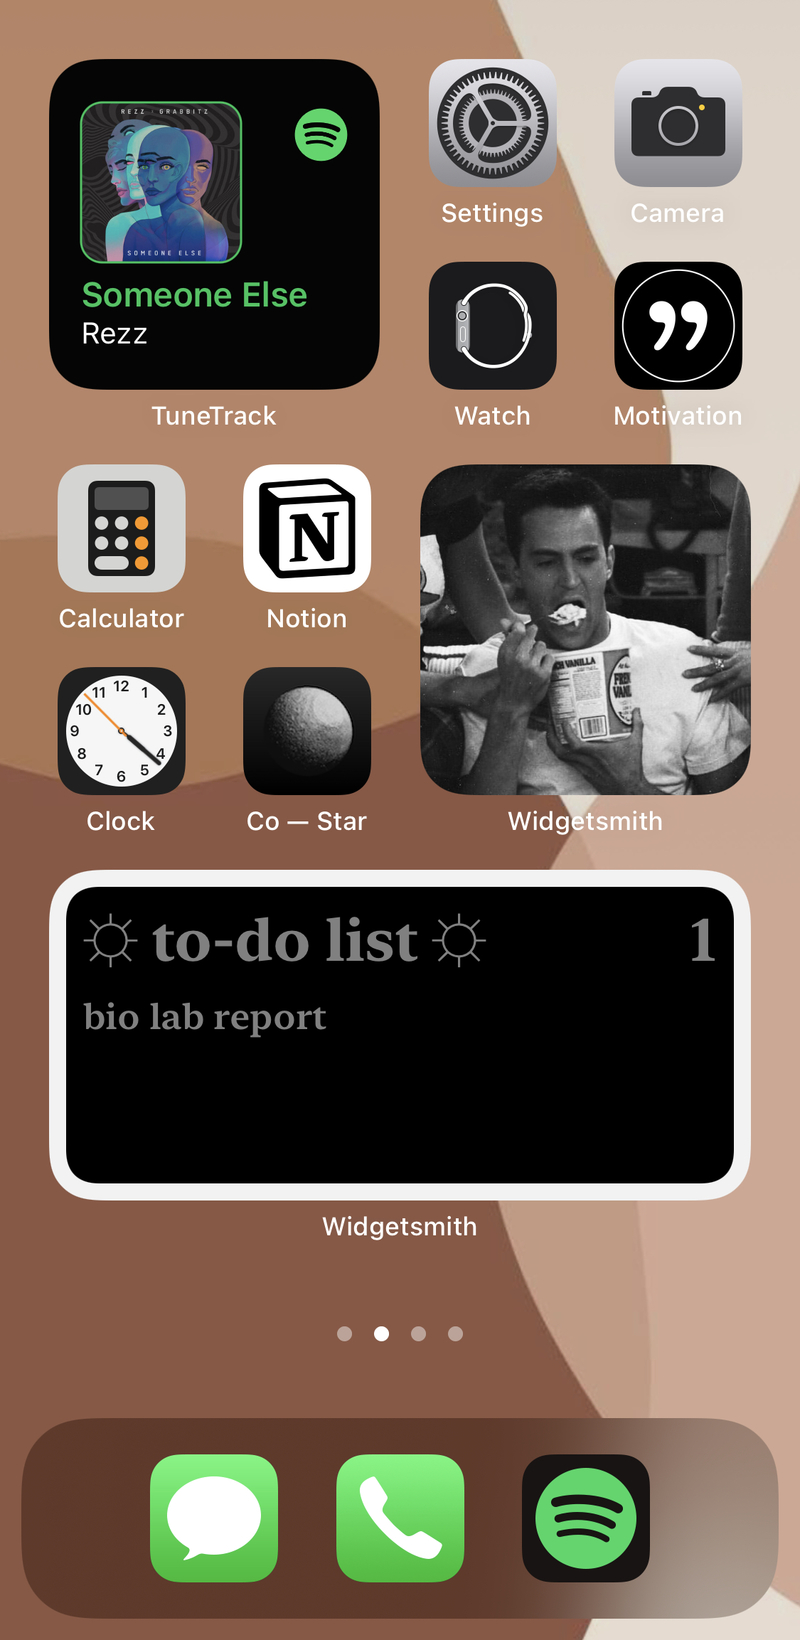
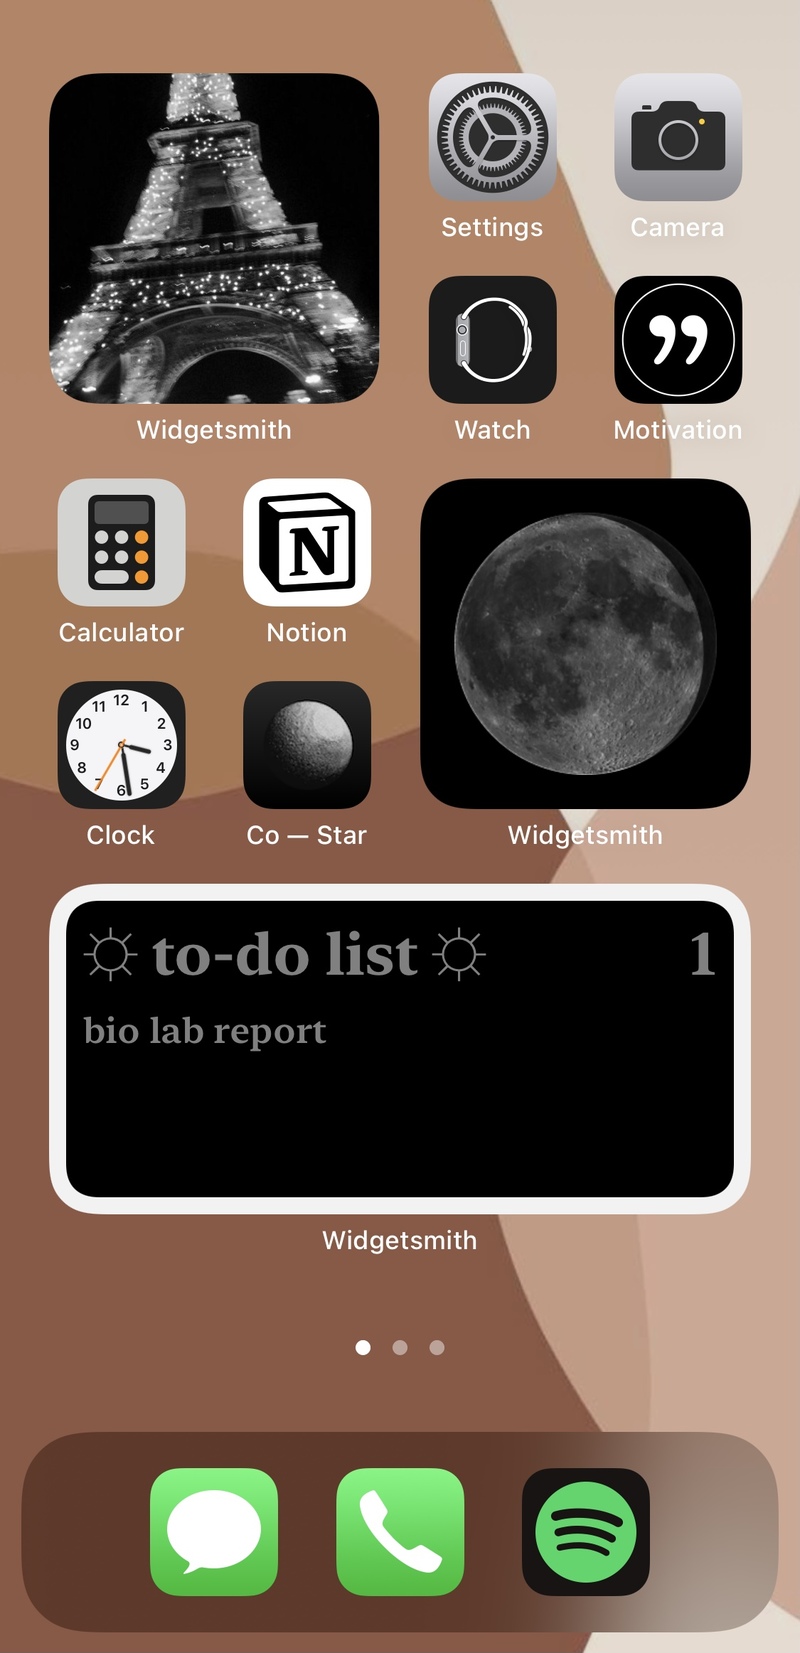
This is how I used Widget Stack! Here I have added to-do list widget via ‘Widgetsmith’, it is linked to Reminders app, where you can create specific lists for different things. I also used the TuneTrack widget here. This is probably the page that took the least time to make!
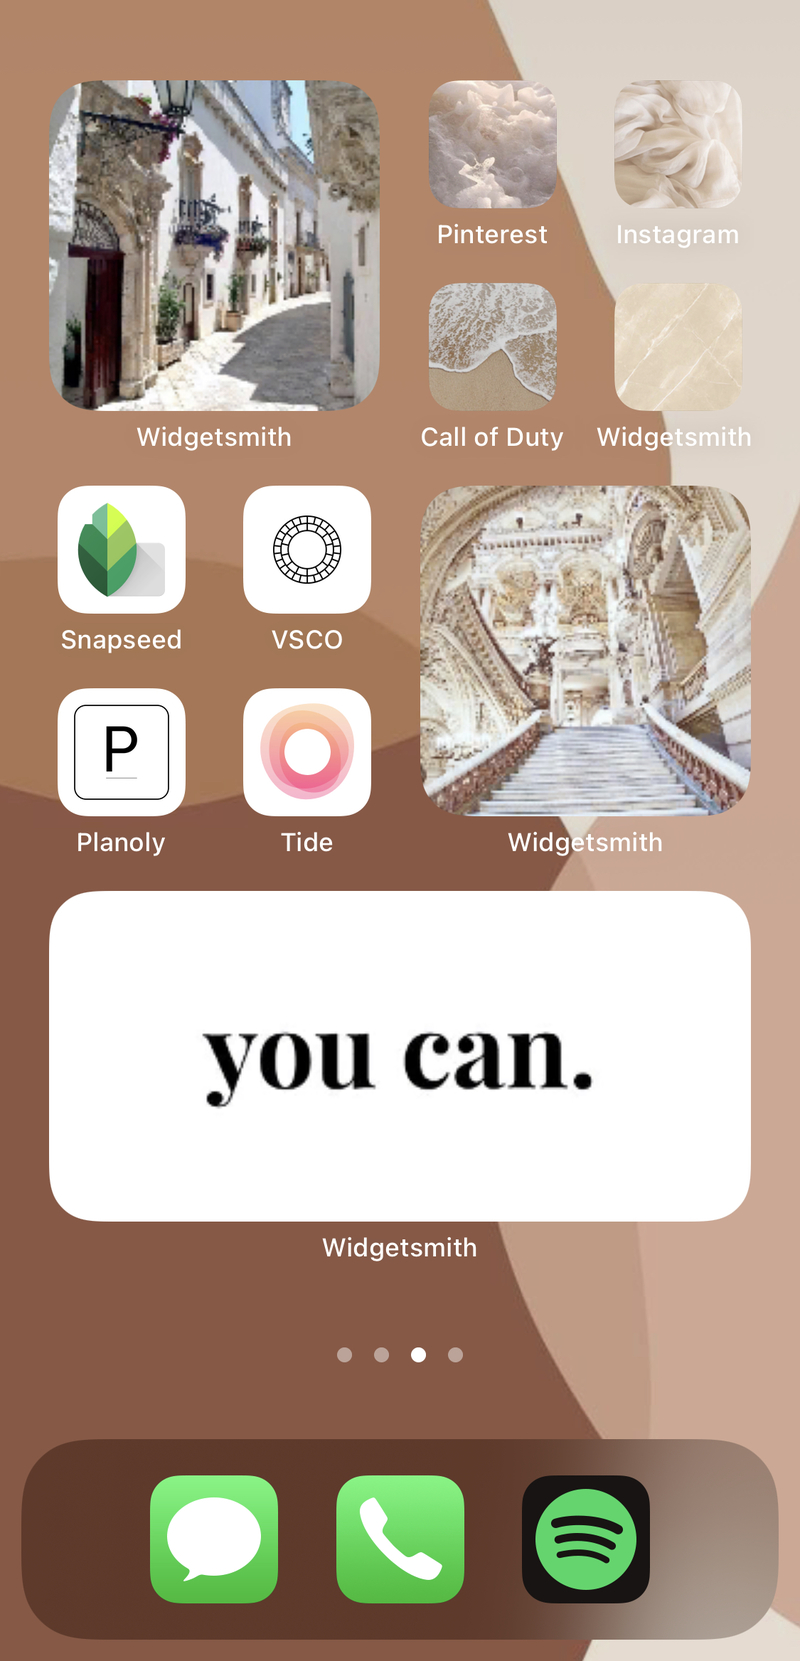
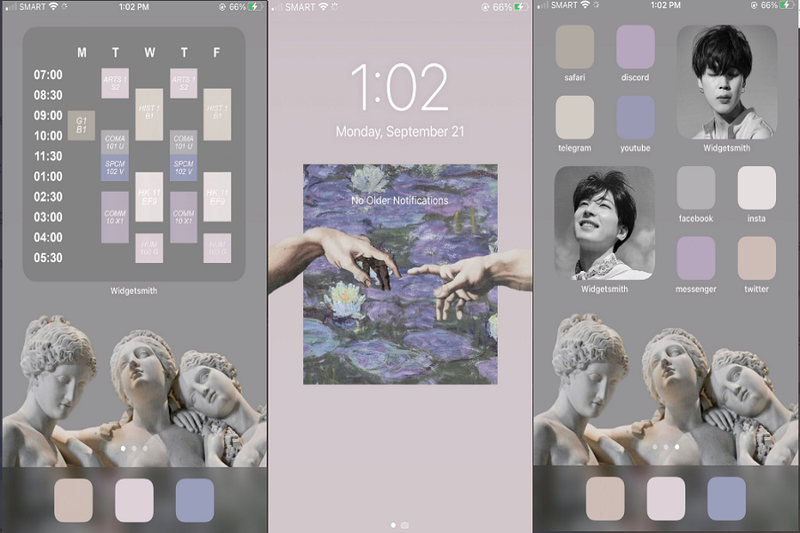
It’s like a white themed page with photo widgets from ‘Widgetsmith’.
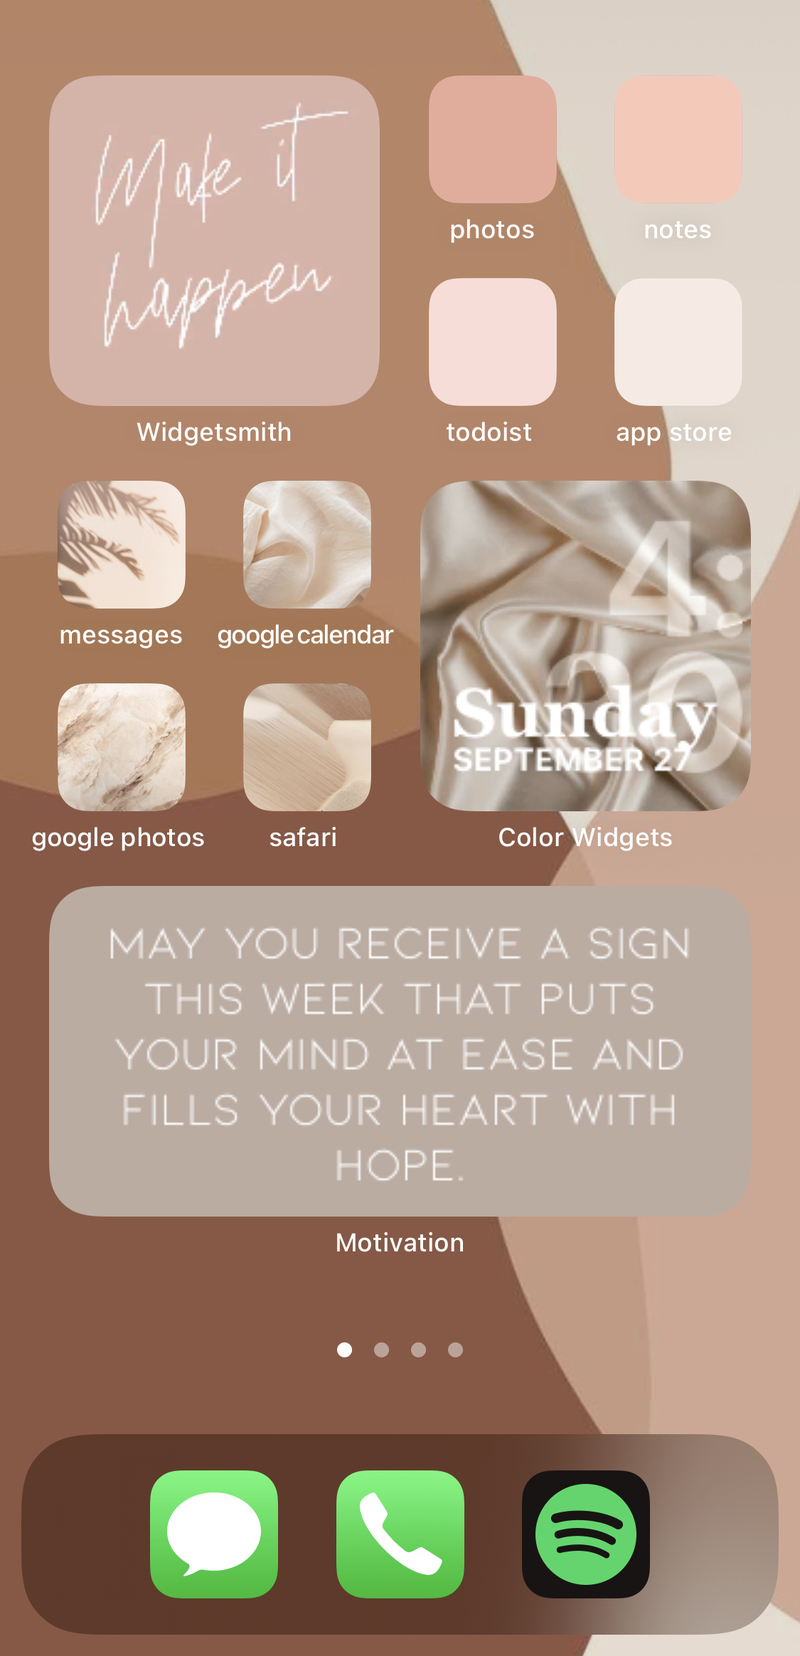
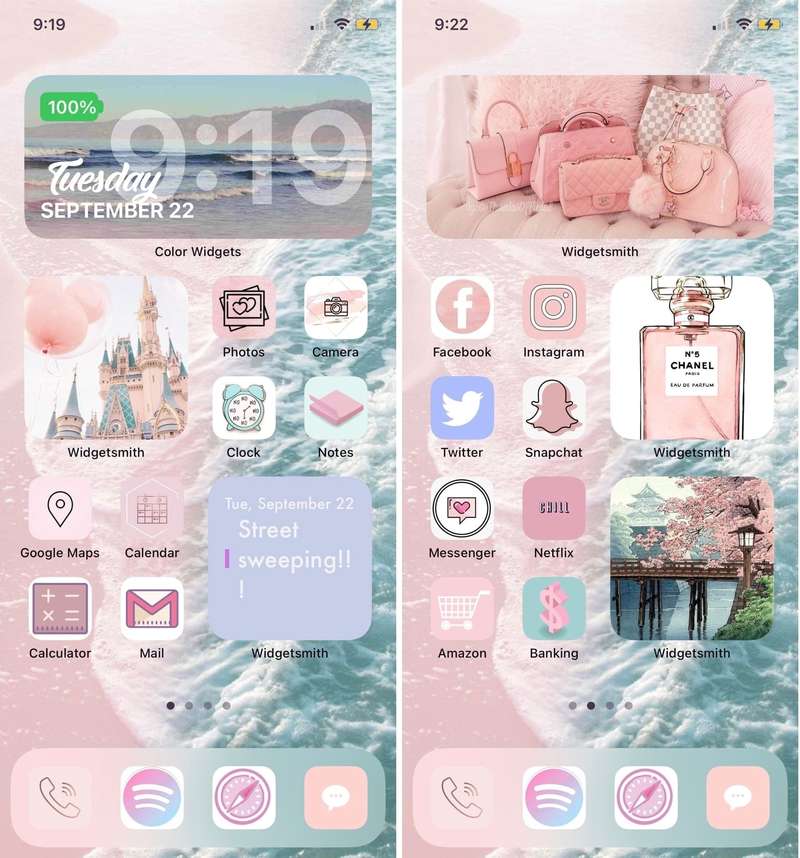
And this one is a bit neutral/pink! Here you can see that I used the ‘Motivation’ widget, as well as a ‘Color Widgets’ widget, as well as an image widget from ‘Widgetsmith’.
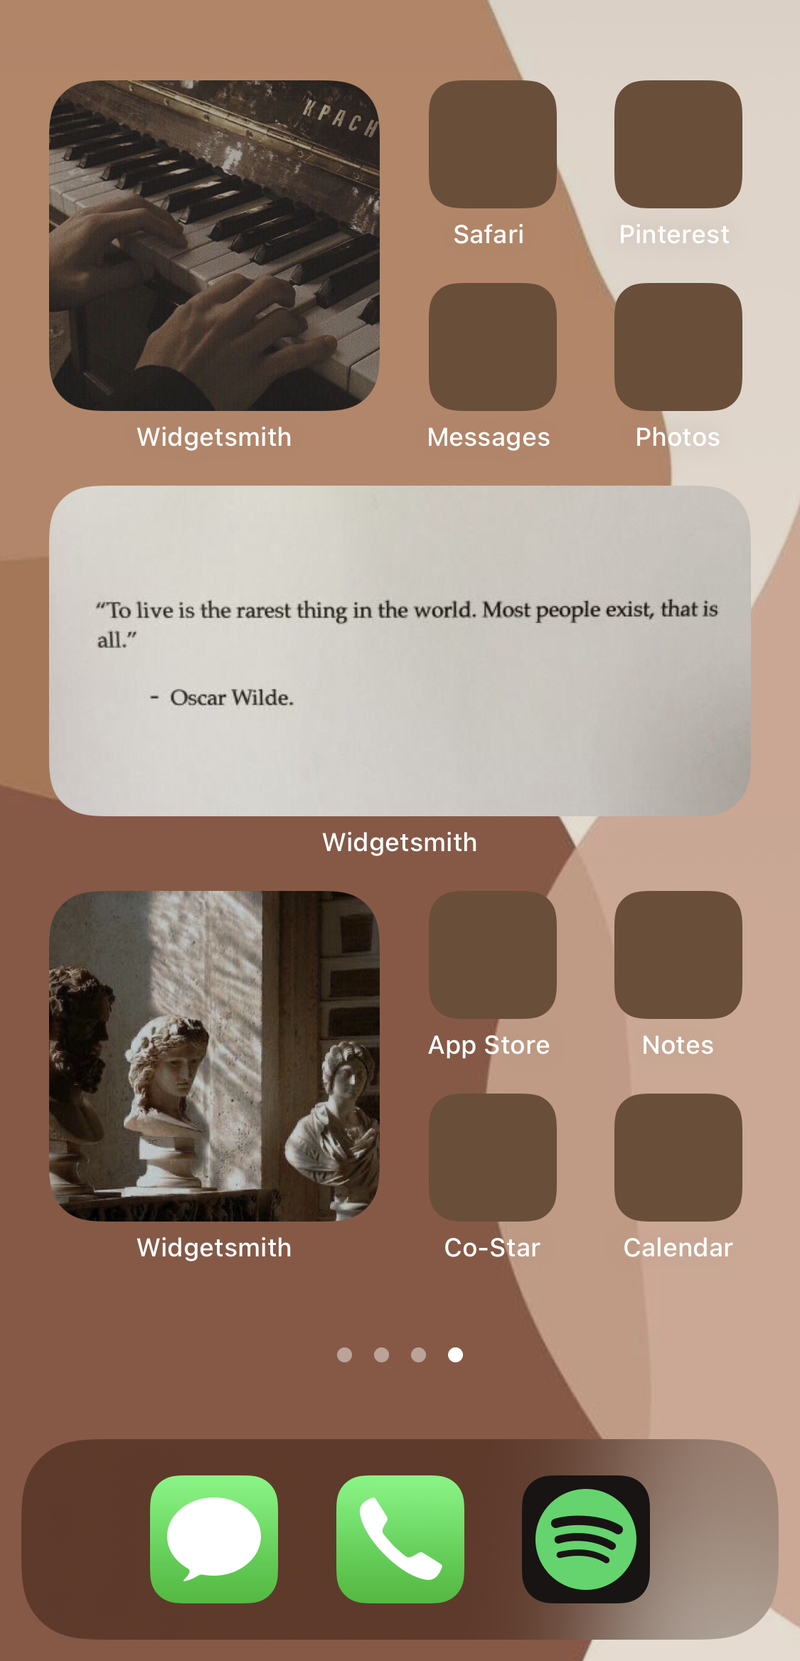
This is the page I am currently using! I like how it’s so simple and neat, I also used the WidgetStack option in this case. Here’s what it looks like:
I hope this guide has been useful to you!