[ad_1]
I know it’s not the beginning of the year anymore, but it’s never too late to set new goals and be determined enough to conquer them. Having a digital mood board on your regular devices (phone, laptop, etc.) could provide a daily dose of positive affirmations and reminders to help you get through the day with your goals in mind. It’s true that mood boards can be purchased or ordered online, but creating your own is so much more personalized and could be a fun recreational activity. In this article, I’m going to tell you how to make your own digital vision board, so let’s get started!
Step 1: Choose images
I usually use Pinterest to do this, but you can use other websites such as Unsplash who provide images. All you have to do is find Pins (if you’re using Pinterest) that match your goals for the year. For example, if one of your goals is to eat healthy, you can search for healthy food pins and find delicious meals. This will motivate you to eat healthy! Remember that the number of images you need will vary depending on the size of the vision board and the number of images you personally want on your vision board.
Step 2: Open Canva
Now that your photos are ready in a Pinterest board, you can move on to the next step: open your Canva account. If you’ve never used Canva before, don’t worry. This is a website/app that can help you design all kinds of things like collage, poster, brochure and many more. All you have to do is open Canva and click on the purple ‘Create a drawing’ button located in the top menu.

Once you have done this, a menu like the one below will open. Next, click the plus sign icon above the words ‘Custom size.‘
Step 3: Choose the dimensions
This is when you choose the device for which you are creating the vision board. If you want the vision board to be your wallpaper, you need to find the pixel dimensions of your laptop model.
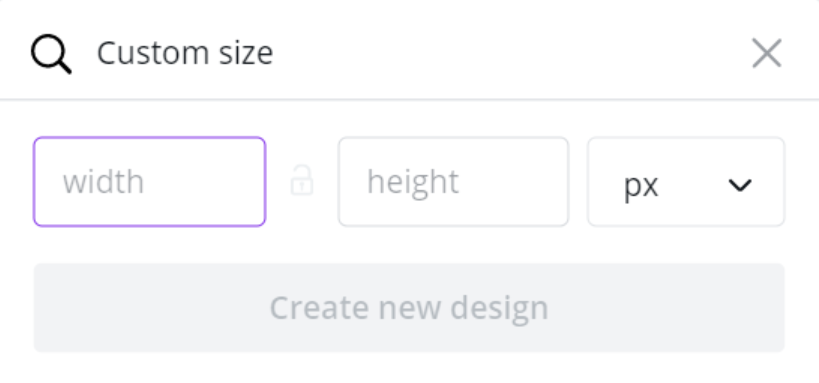
Next, enter your dimensions in the space provided, and click ‘Create a new design.’ Now a blank page should open, the size of your custom dimensions.
Step 4: Add images
Now you’re going to add your photos (the ones you found on Pinterest or any other website you’ve used) to Canva. Instead of downloading and inserting the images, I would recommend copying and pasting them as it’s much faster and easier.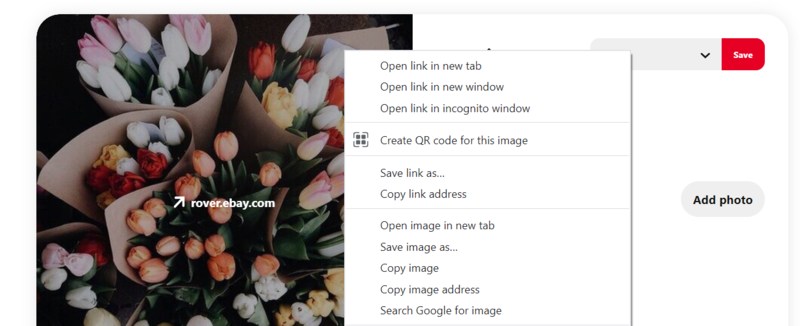
After right clicking on the pin you have chosen you should get a menu like the one above and then you should click ‘Copy the image.’ Now go back to Canva, and you can either right click and paste the image, or just press Ctrl+V.
You can repeat this for the rest of the images, or you can keep adding images after arranging them, which usually works for me.
Step 5: Organize the images
You can choose from different styles of vision boards: either all your images are the same size and are structured in a neat grid, there is some structure, or there is no structure at all. There’s no right way to do it, so you have to experiment with each style to see what you like best. If you want all images to fit together in a similar theme, you can try using a filter for an image to match the theme better.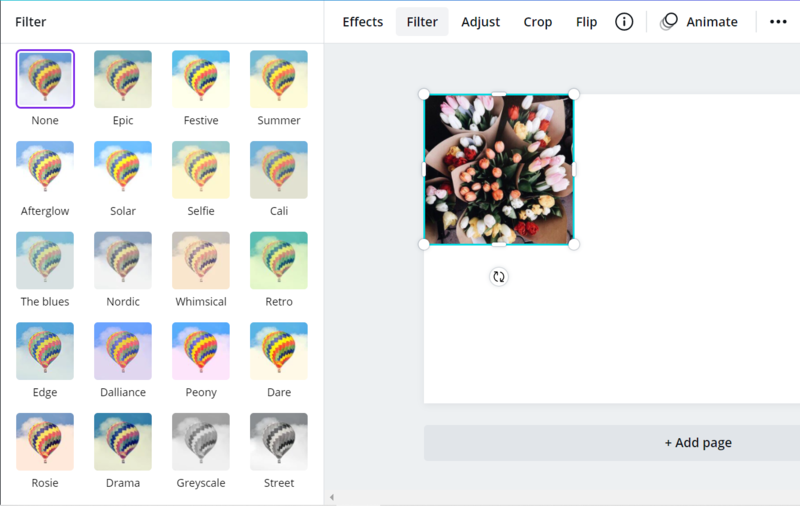
This is what it looks like when you click ‘Filtered‘ in the top menu. Now you can try out the different filters to see what matches the theme the best.
If you are sure about the placement of an image/a few images, you can simply select them and click the ‘To block’ icon in the upper right corner of the page. This will ensure that you don’t move them by mistake.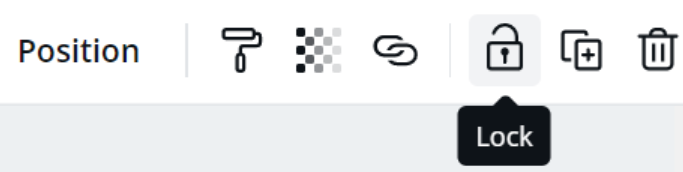 You can also edit your photos using the “Adjust” button in the top left menu if you want to change the brightness, contrast, or other settings.
Step 6: Download your vision board
Now click on the ‘To download‘ at the top right of the screen.

Make sure the file is in PNG or JPG format; it should automatically choose PNG, but check it just in case.

Now click on the purple ‘To download‘, and you should be good to go. There will be different ways to make the vision board your wallpaper depending on the device you made it for. With your vision board as your wallpaper, you can always refer to it to motivate yourself to pursue your goals!
PS I created a light college themed vision board while writing this article, here it is! I hope you found this article useful and that you were able to create your own vision board! I wish you all the best in pursuing and achieving all of your goals!