[ad_1]
How to start learning to cook? There are cakes, cookies, scones, bread and everything else.
It might seem like a lot when you start learning to cook – it was certainly a lot for me four years ago when I started – and I remember the flat cakes, hard cookies and brownies that crumbled from the stove. I taught myself to cook, using YouTube and the Food Network as teachers, but often wished I had someone to help start my journey. Who knows, maybe I would have been more advanced today if I had. Therefore, this is my guide for you, after failing, failing again, and finally learning how to do it right.
1. Equipment
Cooking requires many different pieces of equipment. As a beginner baker, here are some of the things you’ll need when you start baking. You may already have some of these things lying around the house. I have linked to my favorite brands from all of these items.
Things you will need:
- A hand whip – this OXO whip has Phone a good grip on the handle so that even sweaty hands do not slip! The hand whip can be a big strain on your biceps and this whip takes some of the work out of it. All OXO products have this great handle, but compared to the whisk, the balloon whisk works better
- Measuring cups and spoons – Honestly, all measuring cups and spoons will work fine, but personally I prefer the ones with the flat surface over the rounded one. I find them easier to work with, but that’s just personal preference and you might prefer rounded ones.
- rubber spatula – I like this KitchenAid spatula because of its angled top. Other rounded spatulas like this one aren’t as effective as scraping the sides of the bowls. Angled spatulas like the one I linked scrape the sides of bowls, especially sticky batter, much more effectively.
- Rolling pin and cutting board – any brand of cutting board and rolling pin will work, but I prefer the silicone ones due to their non-stick properties and easy grip.
- Baking dishes (sheet, square molds, cake molds, bread mold) – you will use the baking sheet to make cookies, the square pans for brownies, and other traybakes, the round pans for cakes and cheesecakes, and the loaf pan for bread. I actually prefer silicone baking sheets for cookies, but a baking sheet is needed for some types of bread and some cakes. If you don’t want to get the ones I linked, be sure to buy aluminum or non-stick! Glass pans are extremely difficult to work with.
- Round cakes – Any cardboard cake rounds will do. You’ll only really need it if you plan on baking and decorating cakes.
- Parchment – I have never tried and tested parchment paper brands, but this Reynolds parchment paper is perfect for me! Another useful staple for a baker’s kitchen is Reynolds stretch filmbut it is not as commonly used as parchment paper.
- Cooking spray – This cooking spray is great! Always be sure to line your pans with parchment paper as a countermeasure, but this PAM cooking spray works great to keep your pastries from sticking to your pan.
Nice things to have, but not totally necessary
- Hand blender Where stand mixer
- Other molds (Bundt cake pan, cupcake pan, ramekins, springform pan)
- Wire Cooling Rack
- cupcake box
- cake stand Where cake plate
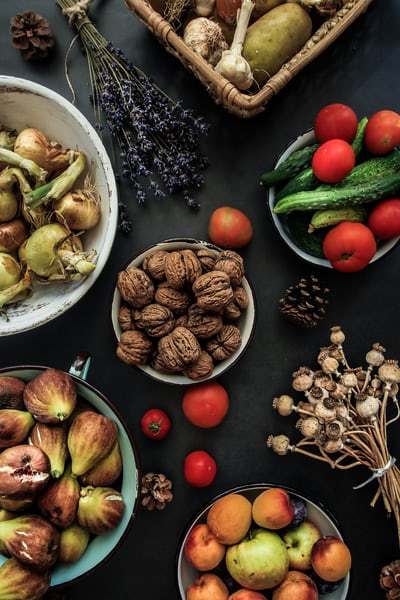
2. Ingredients

The finest, highest quality ingredients are needed to really make your baked goods stand out with flavor and texture. All flours, all sugars and all eggs are not created equal. Here’s a list of crucial ingredients – and links to those that work best. You probably already have a lot of them in your house!
Ingredients you will need:
- Plain flour – I love King Arthur’s all purpose flour, and even prefer it to other brands like Gold or 5 Star. King Arthur produces softer, fluffier baked goods, and the flour itself never becomes clumping like some other brands do. I never sift when using King Arthur flour.
- Sugar – any brand of white granulated sugar will do! It’s always a good idea to keep some brown or muscovado sugar in your pantry for baking that needs it.
- Eggs – any brand of eggs will do! I prefer brown eggs to white eggs in my baking, but I don’t think there is too much difference in the final product.
- Vanilla extract – I love this vanilla! It is a bit pricey, but cheaper compared to others. It’s full of flavor and smells really good. The flavor only really comes through using a teaspoon or two.
- Milk – any whole milk will do!
- Chocolate chips- Lily’s are my favorite because they don’t have any added sugar, but they’re still super sweet and melt really well. I also love having them in my oatmeal and pancakes, unlike some baking chocolates which don’t work well in non-oven environments.
- Oil – any canola oil will do.
- Butter – I prefer to use Tillamook unsalted for a smooth, not chunky finish on cakes. The Tillamook Factory in Tillamook, Oregon is also great fun to visit, if you want to see how they make their butter, cheeses, and ice cream!
- Baking soda and baking powder – any grocery store baking soda and powder will do!
- Yeast – I feel like the red star yeast gives the best rise on the bread!
- Cocoa powder – This Hershey cocoa powder is my favorite! If you choose another brand, make sure it is unsweetened. Sweetened cocoa powder or hot chocolate mixture can ruin the sugar composition of your baking.
Other fun items to spruce up your pastries
- Asparagus
- Food coloring
- Extracts
- Maple syrup
- Sour cream – this sour cream works great but I actually prefer this plant-based alternative to sour cream, it actually gives cakes and frostings a light, springy texture (and it’s also really delicious with fries and salsa). Plain sour cream will still do!
- Buttermilk
3. Find a quality cookbook

A cookbook full of recipes is necessary to start your baking journey. Try a few, my tried and true favorites!
The Cook’s Illustrated Baking Book
Easy cooking from scratch
4. Practice, practice, practice!
Nothing good is ever easy. Keep trying your favorite recipes again and again to deepen your knowledge of the skills required to become a baker. I’ve linked some of my favorite free baking recipes for beginners below!
- Cakes with chocolate chips
- Cheesecake Brownies
- vanilla cake
- peach pie
- Apple pie
- Lime tart
- Vanilla Cheesecake
5. A few tips and tricks
- When baking cookies: DO NOT Roll your cookies into circles then flatten them on the sheet. Use a cookie/ice cream scoop and let the cookies flatten in the oven.
- Use sour cream in your cakes: Using sour cream in your cakes will make them fluffier and moister! Even if a recipe doesn’t call for sour cream, add about a tablespoon into the mixture before adding your flour mixture.
- For the cake icing: Check out this helpful article on how to frost cakes
- For the bread : Let it ride! Don’t be too impatient and always wait for your bread to rise in the allotted time.
- For baking the cakes: ALWAYS use parchment paper, even if you have sprayed and buttered your pans! You never want your cakes to stick to the pan.
6. Do not be discouraged!
Your pastries at first might get lumpy. They could be undercooked, soft, or even burnt. But, don’t lose hope! It takes a few months before anything you cook comes out clean. Then you don’t have to worry about steps anymore. It’s like playing an instrument or starting a sport. You might be clumsy at first, but after a while it will start to come naturally. Take this first step and don’t give up!
Now have fun with your new knowledge!