[ad_1]
Have you ever thought of creating your own website?
Maybe you have a special talent or hobby that you want to share with the world. Or if you really love writing and want a place to publish your work and create a portfolio.
Anyway, the good news is that you can easily create a website. Thanks to frameworks and content management systems like Wix, Blogger, and WordPress, anyone can easily build a website without having to write a single line of code.
In this article, I’ll show you how to start a website as a teenager without having to hire someone to do it for you. Follow these simple steps and your website will be up and running in no time!

Decide what you want to blog about.
First, you need to decide what your website is going to be about. As a teenager, it can be difficult to find something to blog about. It may seem like no one would want to read your content, but that’s not true.
There are tons of ideas you can blog about as a teenager. You can blog about general topics such as beauty, fashion, entertainment, fitness, lifestyle, and faith. You can even blog about other topics like home decor, DIY, childcare, etc. No matter what niche you choose, there will always be someone who wants to see your content.
Find a name for your blog.
Next, you want to name your website. Keep it simple and short, so people can easily remember it. Make sure it reflects your website content. For example, if you blog about pets, you can name your blog something like “lovelypets.com”.
You can also give your blog an unconventional name, like mine, which is: “The Life Puppet”, or if you get undecided, you can just make it your name, for example, “Rooshv.com”
Buy a domain name and web hosting.
The domain name is simply the unique name of your blog. It is the same as your web address.
This is what the Internet uses to recognize your blog. Your domain name is also what people will type into the web browser in order to see your website.
For example, thelifepuppet.com.ng is the domain name of my website.
Additionally, you need a web hosting service. Web hosting is simply a virtual space where all your website files, folders and content will be stored. Think of it as a shelf where everything on your blog is kept until a viewer wants to access it.
Many companies offer both domain names and web hosting. However, the best recommended by experts is Bluehost.
Nevertheless, there are other web hosting companies that offer the same services at cheaper prices. For those living in Nigeria or West Africa, Smartweb is a Nigeria-based web hosting company that offers different web hosting plans at affordable rates. I bought an annual plan and got a free domain name when signing up.
Besides these two companies, there are many other companies where you can buy domain name and web hosting. Do your personal research and determine which company is best for you.
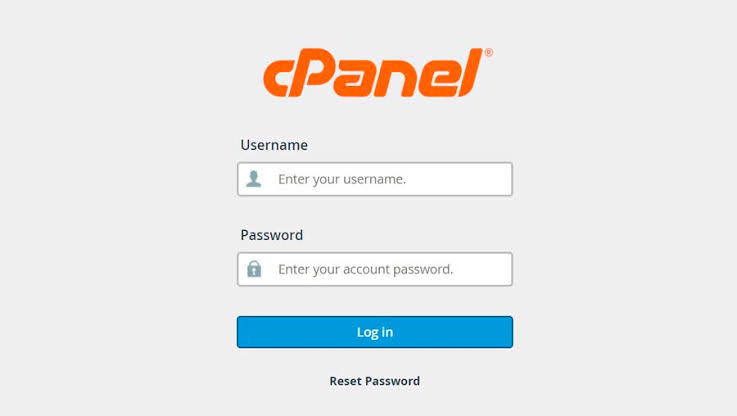
Login to your Cpanel
After purchasing a domain name and web hosting, the company will provide you with the information about your control panel, also known as Cpanel. This is where you will create your website. Log in to your Cpanel by entering the username and password emailed to you by the web hosting provider you registered with.
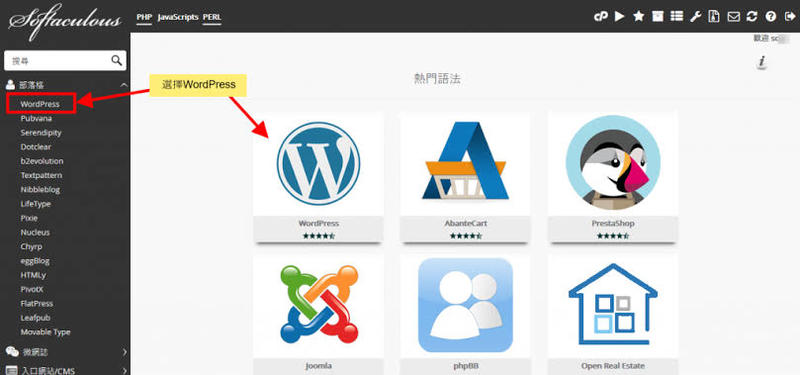
Install WordPress from Softaculous.
WordPress is a content management system used to build websites. It is free and open-source, which means it can be customized and modified according to the user’s choice.
Before, you must do a manual installation of the WordPress software on your Cpanel. Fortunately, most control panels now come with a free automatic software installer called Softaculous.
Scroll down to the software section of your control panel and click on Softaculous software. Fill in the basic details of your website and click “install”.
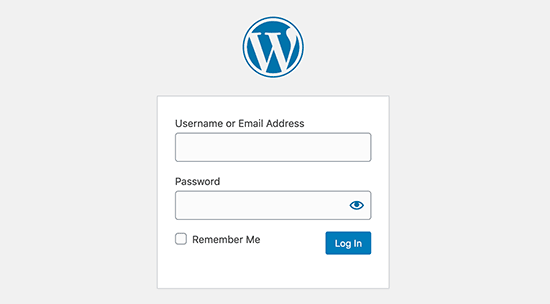
Login to your new WordPress site.
Congratulations! You have successfully created a complete website yourself. It wasn’t very difficult now, was it?
Now all you have to do is log in to your new WordPress website to finish customizing your blog and start creating content.
You should be able to login directly from your Cpanel. But you can always go to http://(your-domain-name)/wwp-adminand it will show you a login page where you can login to your dashboard.
Customize and create content!
It’s time to personalize your website and make it reflect your tastes. If you’re not sure where to start, I suggest you do these few things first.
Choose a color theme for your blog.
Mine is Magenta and Gold.
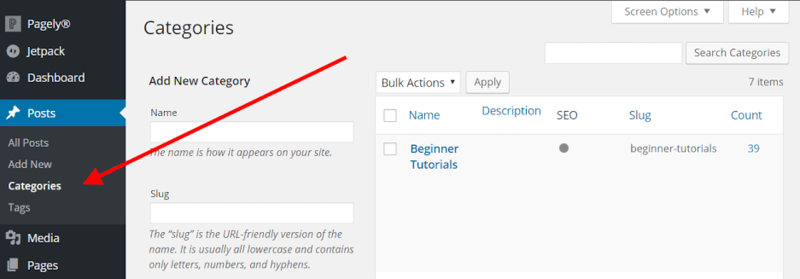
Create categories and tags.
To do this, go to the posts section of your dashboard.
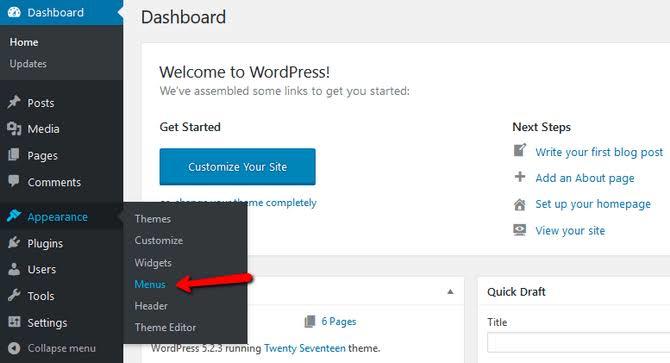
Create a menu.
You can create as many menus as you want. However, to get started, you only need a main and social menu.
A main menu contains the links to all of your blog pages, while the social menu contains the links to all of your social media accounts.
Monetize
This step is not necessary if you just want to blog for fun. But, if you want to make money from your website, there are several ways to make money.
The first and most popular is to display ads on your website, and you can do this by signing up for Google AdSense.
You can also become an affiliate marketer and work with brands to promote their products.
To finish,
Creating a website with WordPress is not difficult. However, it can be daunting, especially if you’re not very tech-savvy. In order not to get discouraged, be sure to read a lot and equip yourself with the necessary knowledge.
You can also check out other people’s experiences of building their own website. I blogged about my self-hosting experience after two years of using free WordPress. You can check it out for inspiration to create your own website.
I hope this tutorial was helpful. Feel free to ask questions and I hope you enjoy your new website!